Building a Smart Breathalyzer with BotFactory’s SV2 Printer
Have you ever wondered how those sleek breathalyzers used by law enforcement or in workplace safety checks are made? Imagine being able to create one yourself, right from your desk, using cutting-edge technology. Enter BotFactory’s SV2 Printer, a game-changer in the world of electronics prototyping specializing in building 3D printed PCBs and PCBAs. This article will guide you through creating a smart breathalyzer circuit—a cool application of IoT (Internet of Things) and IIoT (Industrial Internet of Things)—using the incredible capabilities of the SV2 Printer. Ready? Let’s dive in!
Why the SV2 Printer is a Game-Changer
The SV2 Printer from BotFactory is not just any 3D printer—it’s a high-tech marvel that brings your circuit designs to life with unmatched precision and efficiency. Traditional PCB manufacturing can be a hassle, involving long waits and high costs for multiple iterations. The SV2 Printer eliminates these headaches by allowing your Gerber designs to be printed, assembled and soldered in-house, that too, in minutes. It’s like having a mini electronics factory on your desk!
Designing the Breathalyzer Circuit
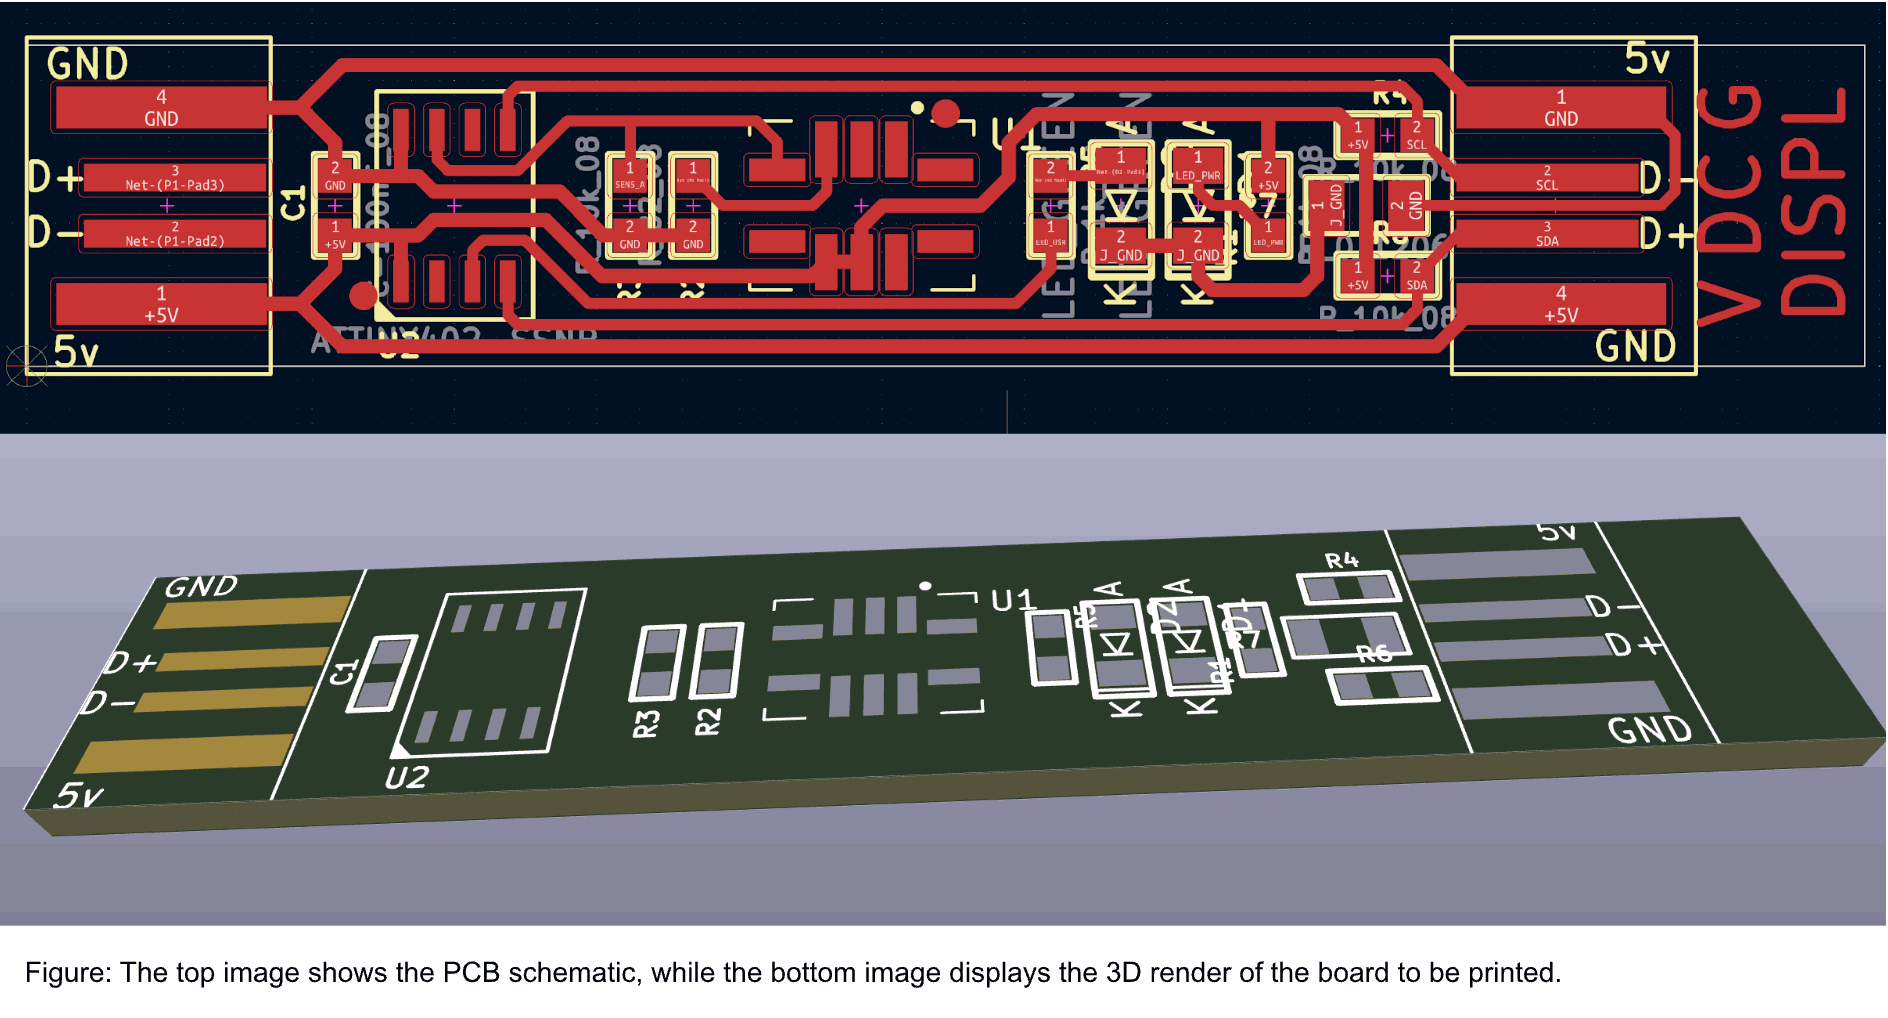
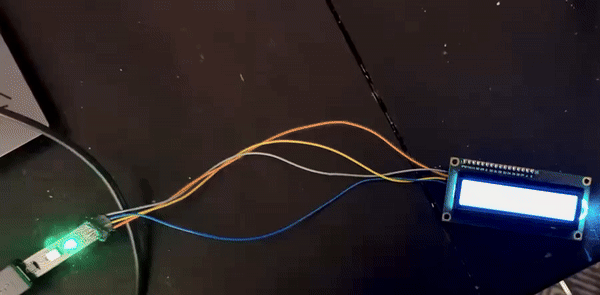
First things first—let’s show you how we designed our breathalyzer circuit. We used KiCad, a free and powerful PCB design tool, to lay out our components, including a gas sensor, a microcontroller, connected to an LCD display.
Component Layout:
- We used the MICS-6814, renowned for its sensitivity and accuracy in detecting gases present in breath to identify traces of alcohol and similar substances.
- Microcontroller: We used The ATtiny 402 which is perfect for this compact project. This chip can be easily programmed with an Arduino Uno aswell.
- Display: An LCD screen to show the the sensor readings.
- Power Supply: The board design has a USB port printed that can be connected via any hub and powered by any source.
Schematic Design:
- We created our schematic in KiCad, ensuring all components are correctly connected. We try using all SMT components.
- The 3D file can be exported and used in other software to design enclosure,
Bringing Your Design to Life with the SV2 Printer
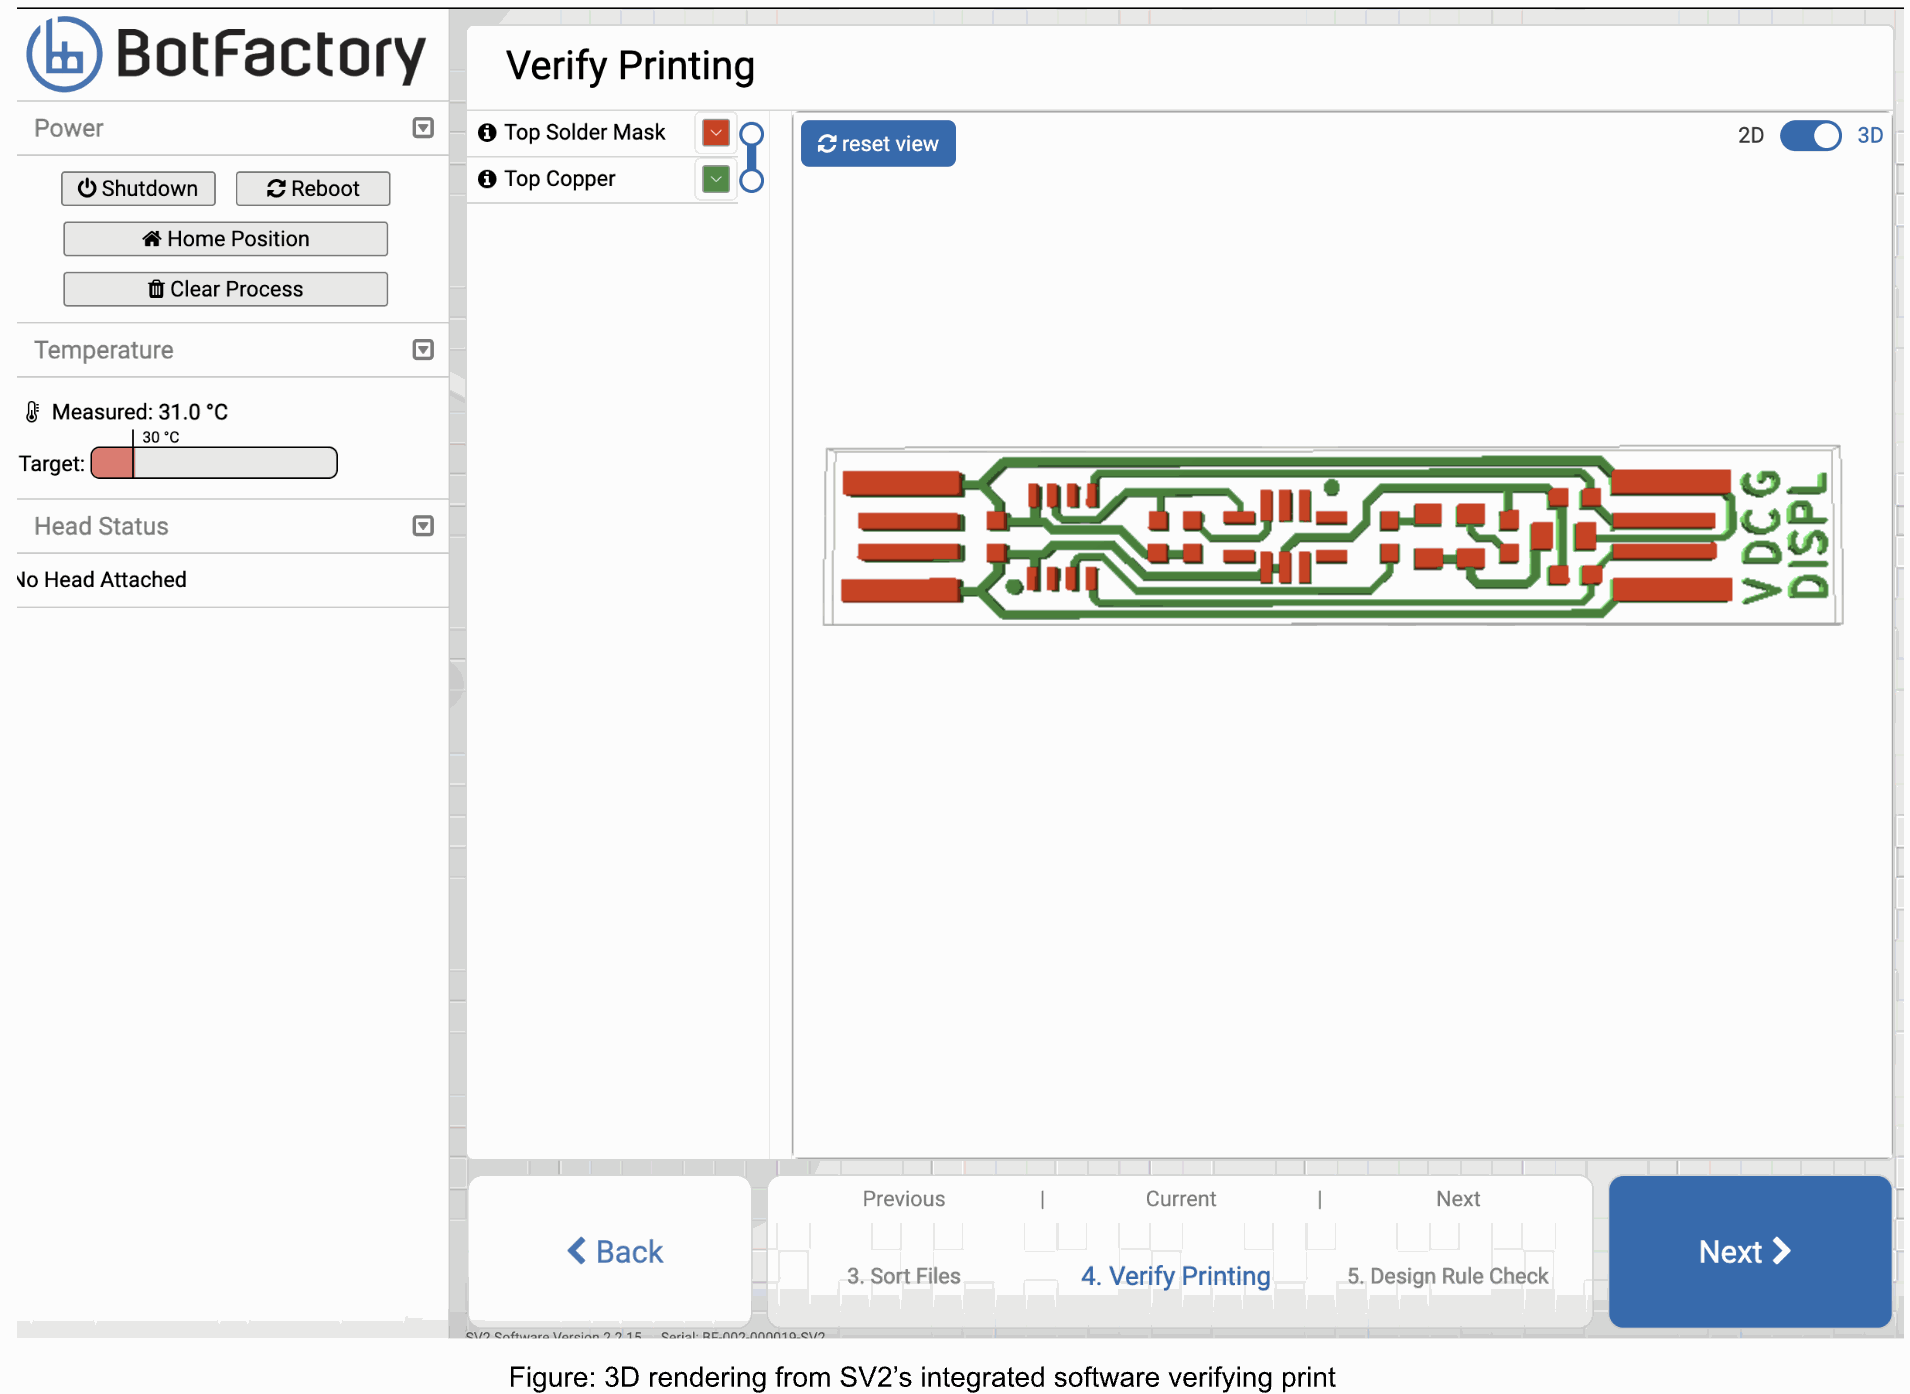
With our design finalized, we printed it using the SV2 Printer. We loaded the Gerber files into the SV2 Printer’s free software, which runs on a single-board computer and can be kept offline. The software verified the design and checked for errors before printing.
Layering and Curing:
- Printed the initial conductive layer with the SV2 Printer, controlling both layer thickness and conductivity.
- Cured the ink between passes using the integrated heatbed for stability and durability.
- Added insulating layers between the conductive layers to prevent electrical shorts.
Final Curing and Inspection:
- After printing all layers, we performed a final curing process.
- Inspected the PCB to ensure it met quality standards and was ready for use.
Programming Your Breathalyzer Circuit
With the hardware ready, we moved on to programming. Here’s what we did:
Installed Required Libraries:
- Opened the Arduino IDE.
- Went to Tools → Manage Libraries.
- Searched for and installed the "LiquidCrystal I2C" library.
- Restarted the Arduino IDE.
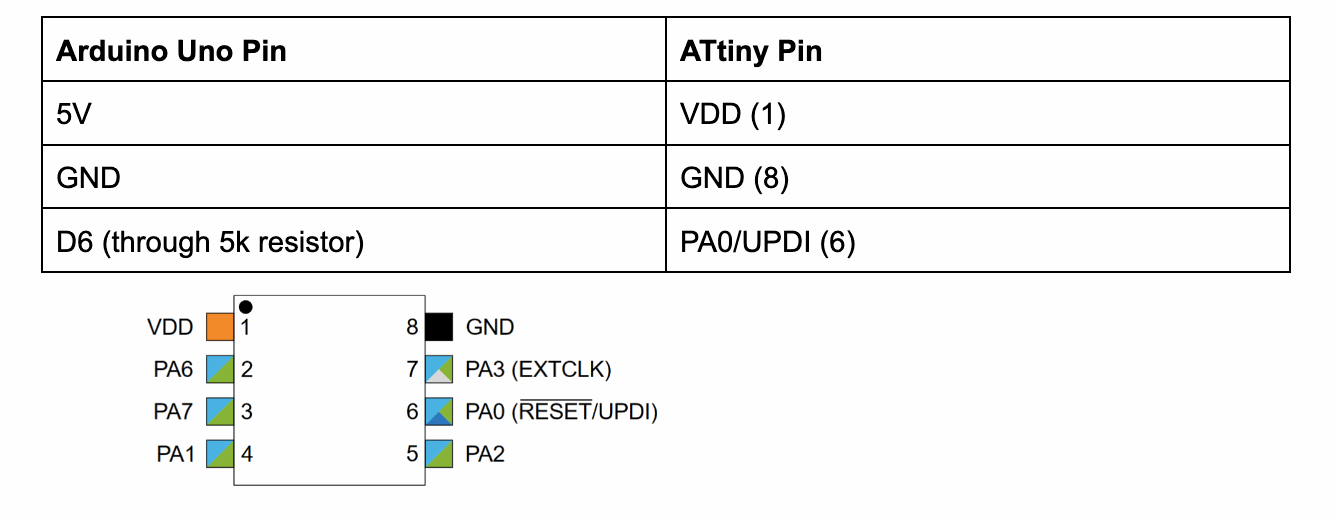
Setup Arduino IDE for ATtiny 402:
- Installed megaTinyCore in the Arduino IDE.
- Used “jtag2updi” with the Arduino Uno (code available upon request).
- Connected the Arduino Uno to the ATtiny 402 using the specified pin connections.
-
Programming Steps:
- In the Arduino IDE, selected the appropriate board and chip:
- Tools > Board > megaTinyCore > ATtiny 402
- Tools > Chip > ATtiny 402
- Tools > Programmer > jtag2updi
- Tools > Port > [Uno COM port]
- Uploaded the sketch using Sketch → Upload Using Programmer.
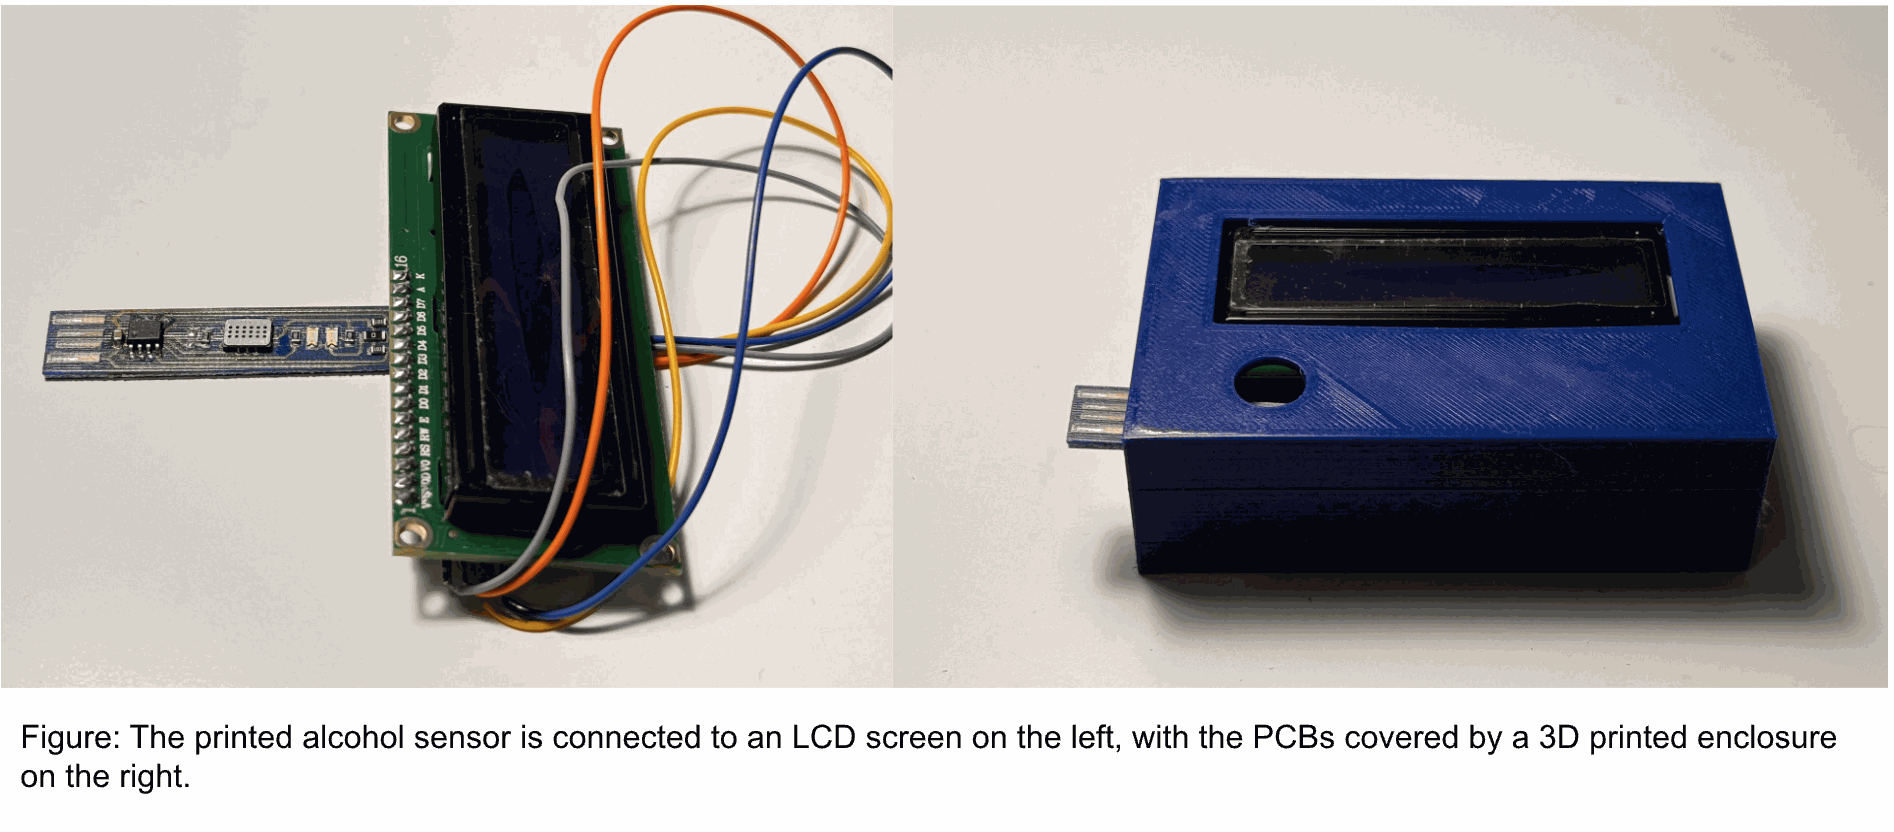
Conclusion: Unleashing the Power of the SV2 Printer
By leveraging the SV2 Printer’s advanced features, we swiftly brought our breathalyzer circuit to life. This project showcases BotFactory’s technology and highlights how IoT and IIoT innovations can be accessible and fun. Dive into the world of 3D printed PCBs and see what amazing projects you can create!
For more detailed steps and to explore the full range of capabilities of the SV2 Printer, check out BotFactory’s page.
Happy prototyping!